The band Majical Cloudz? The opening track on Solange’s acclaimed album A Seat at the Table? That’s Matthew Otto’s music production wizardry.
Find out how a Solange collaborator and ex-Majical Cloudz producer uses EQ.
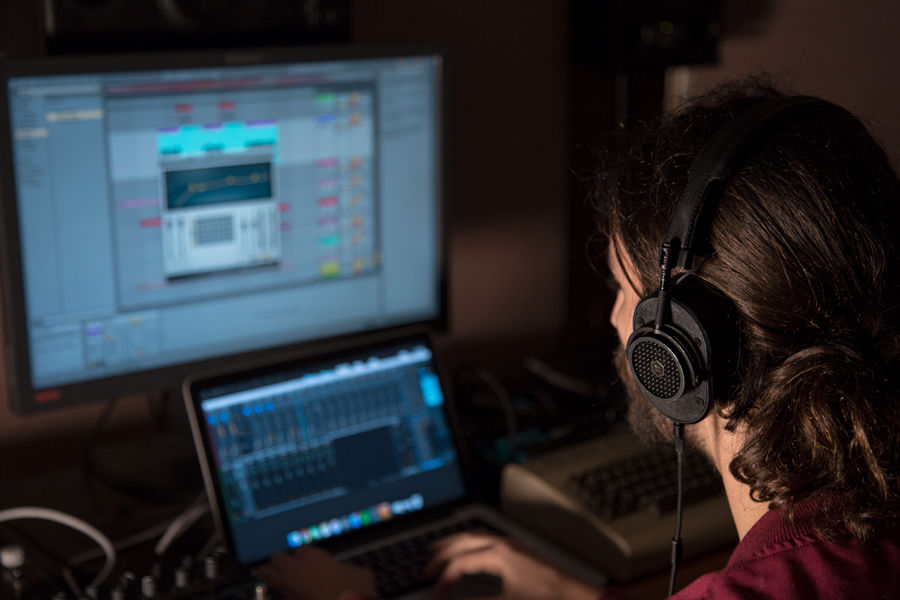
Matthew Otto is a name you might not recognize instantly, but you’ve undoubtedly heard his productions.
The band Majical Cloudz? The opening track on Solange’s acclaimed album A Seat at the Table? That’s Matthew Otto’s music production wizardry.
Graduating from a degree in Electroacoustic Music, Matthew’s been steeped in Montreal’s DIY music scene for almost a decade. He was part of the Torn Curtain scene that yielded Grimes, d’Eon, Doldrums, Sean Nicholas Savage, She Devils and too many more to name.
Since the end of the Majical Cloudz project, Otto has stepped up as an independent composer, producer and mixing engineer working on high calibre albums, scoring films and producing upcoming releases of independent artists like Mind Bath, Moses Sumney and Doldrums.
Over brunch, I asked Matthew to reveal some of his studio secrets for everything related to EQ techniques. Take notes!
What’s your personal approach to EQ?
I try to use it as minimally as possible, but of course it’s inevitable. Nearly every track when I mix has an EQ on it—a parametric EQ.
I aim to make as few changes as possible—to keep it at a minimum. It’s sort of like golf: you want to keep the amount of strokes to as few as possible to get the ball in. I like to do the same for EQ.
The only time I would use a sharper ‘Q’ would be to cut out specific ringing frequencies or feedback. Generally I do broader strokes. I find it sounds a lot more natural than carefully sculpting a sound—which ends up sounding like some kind of Frankenstein monster!
Can you give an examples of corrective EQing versus creative EQing?
A corrective approach is what I almost always use EQing for. Let’s say you have a track of somebody playing a glockenspiel—a very high pitched sound—but you’re getting a lot of low end. It’s even activating the sub bass. That’s an extremely unnecessary range of frequencies to have within that track. So a corrective approach here would be to put a high-pass filter on it.
A creative approach… that’s a hard line to draw, because the whole process is creative in a sense. Creative EQing would be to make a sound that doesn’t exist naturally. You’re not trying to achieve something that accurately represents a sound the way we perceive it in real life, instead you’re trying to create something new out of something you’ve started with.
A good example would be something that’s full range with a lot of high end. Like the sound of a piece of paper tearing, mic’ed close enough that it creates proximity effect with the microphone. That has a lot of low end and a lot of high end—all the tiny fabrics tearing apart.
So you can take that and put a high-pass filter on it and turn it all the way up till about 8kHz, until you’re getting almost this bright thin granular sound. You can then use that sound for something else, as a musical texture rather than something that is reminiscent of a paper ripping.
What’s an EQ tip you’d like to share?
It’s not a very exciting answer I use almost exclusively the no-frills Waves Q EQ plugins. I usually use Q6 or Q8 no matter what, so I can turn off and on the individual changes I make. It’s very basic, precise and transparent, which I like.

I rarely look for EQ in terms of colouring a sound or making a sound more driven or saturated. I like it to be clean and transparent and relatively surgical. For me it’s all about the original sound and not hindering it, more so than it is an additive or aesthetic effect.
Do you ever try to shape the narrative arc of a sound with EQ?
Yes, of course. A lot of the music I’ve made has been based in repetition and looping. So variation is very important. Sounds that change over time in order to keep the track sounding like there’s an evolution.
And in terms of EQ, that would involve turning an EQ into a filter a little bit. I could put a high-pass and a low-pass filter and a separate LFOs on each that moves up and down the frequency spectrum. You’d be taking a full range sound and narrowing it, filtering up the whole thing, having a sound change.
If you’re using Ableton Live, you can use a Max for Live LFO plugin for example for control certain parameters of other plugins.
I’m always looking for ways to keep sounds changing, keep them interesting. So that’s definitely something I do.
What’s a good EQ technique you use on a vocals?
For vocals I usually like to have a separate ‘dry’ track. Not necessarily dry as in completely untouched—but rather without reverb, delay, chorus or any spatial effect.
With the dry vocals I usually look for the singer’s presence, the part that conveys the most intelligibility and that tends to cut through the mix the best. I call that the ‘meat’ of the person’s voice, right there in the mid-range. For men it’s around 1kHz and for women around 2kHz—as a starting point, it’s not true for everyone. You either have to use a spectrum analyzer or find it by ear. I recommend putting a notch filter and bringing it up around that frequency and moving it around until you find the meat of their voice (more on this below).
So for EQing I’ll bring that ‘meat’ up gently, and I bring up the very high end—above 8kHz—to give it more clarity. It’s also very necessary it to roll off the low end. That’s because sometimes the vocalist sings close to the microphone and it can cause proximity effect—which essentially adds a lot of bass and sub bass. So you’d want to roll that off, under 80 Hz. It depends on the voice, if they have a very deep voice you want to be little more careful about that.
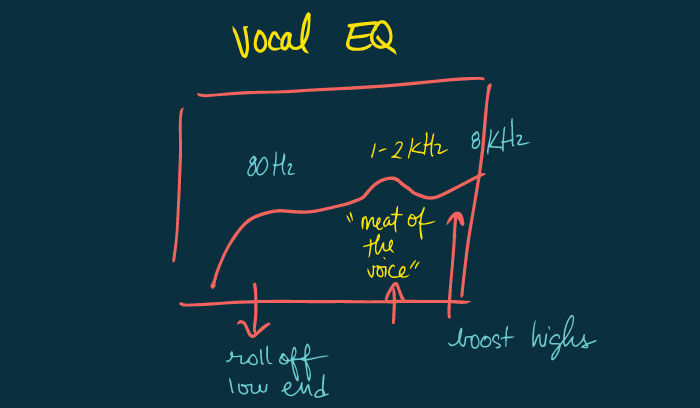
Otto’s EQ technique for vocals.
And then it depends what the vocals need. If somebody’s got a very thin nasal voice, sometimes you have to artificially beef it up by adding some low end in the EQ. You’re going for what’s more natural about the voice, but sometimes you have to compensate for certain things that suit the mix or fill the voice out.
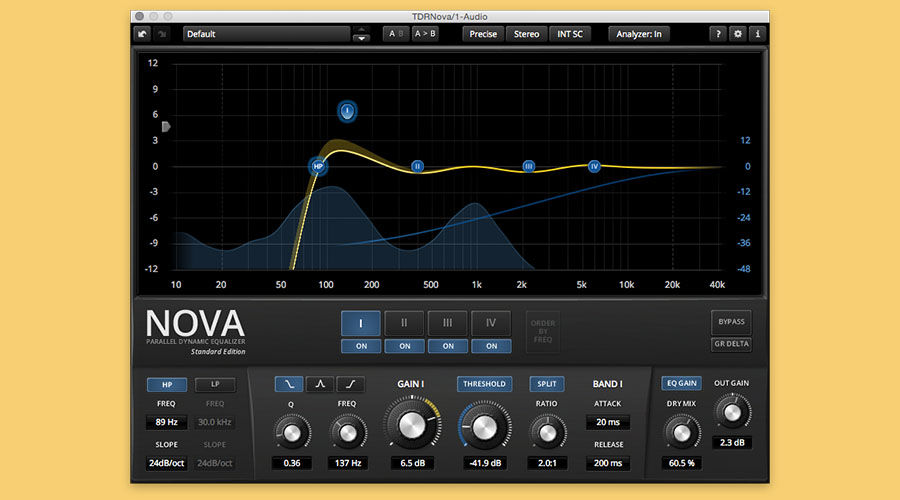
What are your favorite EQ plugins?
Waves Qs. And I do like the TDR Nova. That one has a very nice sound, so I use it less on an individual track and more on a complete mix or a bus—a drum bus for example. It tends to sound better on several tracks. It does sound good on individual tracks, but it’s kind of a waste because it’s quite taxing on CPU. The TDR Nova also has a built-in spectrum analyzer, which is useful.
What is EQ sweeping? Do you use it? What is it good for?
That’s what we were talking about earlier the vocal EQ and finding the ‘meat’ of the person’s voice and intelligibility.
You have to create a little notch and exaggerate it, push it way high. It doesn’t need to be super tight, but quite tight, or else you’re just gonna boost everything at the same time. So make a relatively tight Q and then move it around until you hear the frequency pop out. You’ve found the ‘meat’! Then bring it down to a more reasonable level.

If you were looking for weird frequencies that are ringing, then you could use a very narrow ‘Q’.
Let’s say you’re doing a live recording and using a microphone on a percussion instrument. Every time you hit the percussion instrument, the microphone feeds back in this very particular way. You’d want to cut that frequency—which is almost like a sine tone. That’s where you have to get really narrow with the ‘Q’ to find it. The spectrum analyzer in that case would be more useful than for a more broad sculpting of the color of a sound.
You can also use a spectrum analyzer, but sometimes it’s hard to tell exactly which one of those little bumps is the one that you want! It can help, but I usually do it by ear the way I just described because that’s what you ultimately want, for it to sound good. So why not just cut straight to it and find the point that sounds nice.