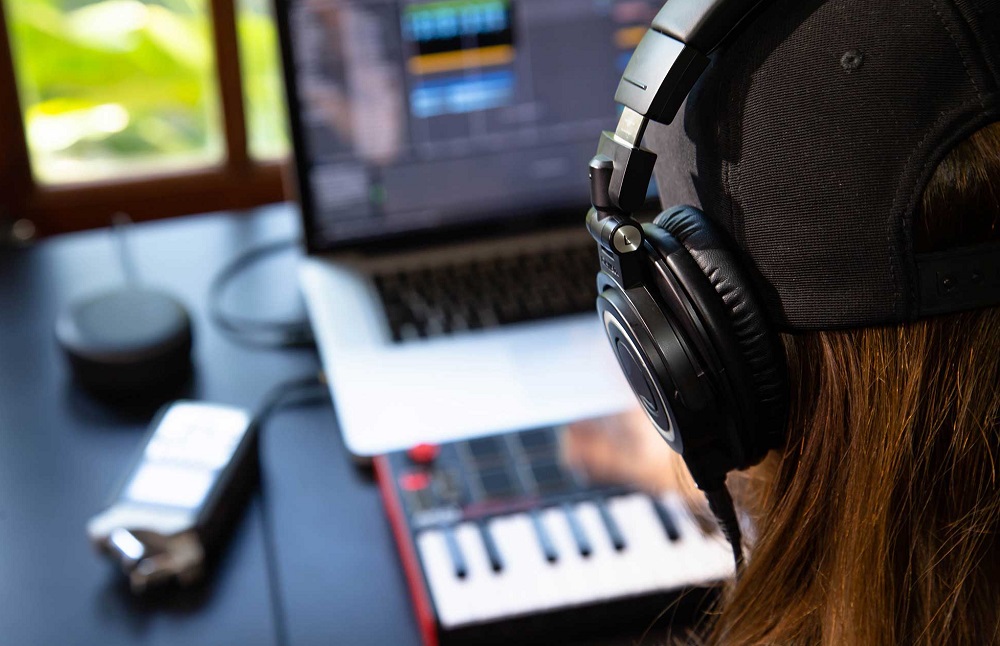
Understatement alert: The world of sample packs is vast… Thanks to free sample packs, any sound you can imagine is available in just a few clicks.
And with more people producing music digitally, samples have become a vital part of music production.
Unfortunately, Samples still get a bad reputation…
Some producers feel that all the sounds you work with should be recorded hardware instruments. Which is totally fine! Recording your own audio, with your own gear is an incredible and rewarding process.
But dismissing sampling removes an entire universe of creative tools. Sampling is useful to all producers no matter what genre you’re working in.
In this article I’ll show you how Sampling can go way beyond dragging and dropping audio into a track and how to make samples your own using simple but effective techniques.
Below are creative strategies that will help you get the most out of your sample packs and make your sound unique no matter what the source is.
1. Manipulate your samples with effects
The simplest and easiest creative strategy for samples is to shape them with audio effects. Even simple effects like reverb, delay or tremolo will open up your samples and make them unique to your own sound.
There’s a million different ways to use effects on samples, so I won’t get too specific here.
But loading your samples (especially loops and beats) into your DAW, building a simple effects chain with your favourite VSTs, and tweaking to taste will inspire some interesting directions to take with the rest of your samples and tracks.
Effects are also a great way to help your samples fit into track you’ve already started. Samples can often stick out in a mix because of clashing characters.
If you’re working with samples to help fill out some of your other recordings, using similar effects while mixing with samples will help you glue it all together.
2. Run Your Samples Through Sampler VSTs
There’s a reason samplers continue to be the go-to hardware instruments at the centre of most studios—they allow you to take samples and easily sequence them into loops, apply your hardware audio effects chains, time stretch, chop and everything else that makes samplers fun.
But certain sampler plugins give you all the same sampling possibilities in your DAW for a fraction of the price of classic hardware samplers.
Most DAWs come with their own onboard sampler modules. But working with sampler VSTs is also a good route to take if your searching for the right sampling workflow.
The benefits of working with a separate sampler VST include easier tweaking of ADSR envelopes, quick filtering, pitching and MIDI controller mapping—just to name a few.
Here’s a few sampler VSTs to consider:
Togu Audio Line TAL-Sample
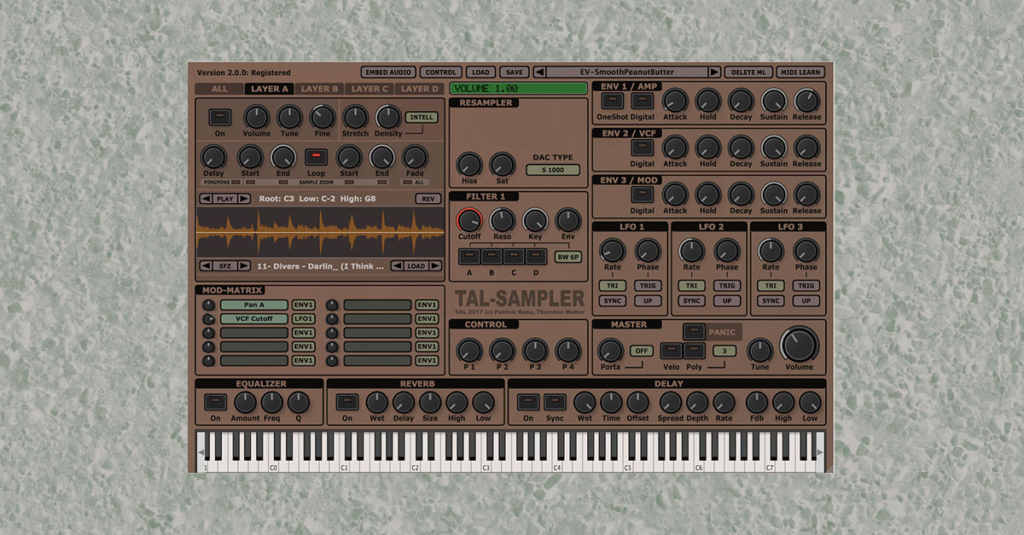
TAL-Sampler is takes its inspiration from the past and emulates the classic digital-to-analogue conversion process that many cult favourite hardware samplers use.
You can also choose between different digital analogue converters (DACs) to get that vintage analogue sound inside your DAW.
Slow your samples down with classic time stretching, or use the Squarepusher feature to modulate sample start times and create some cool glitch effects.
DiscoDPS Bliss
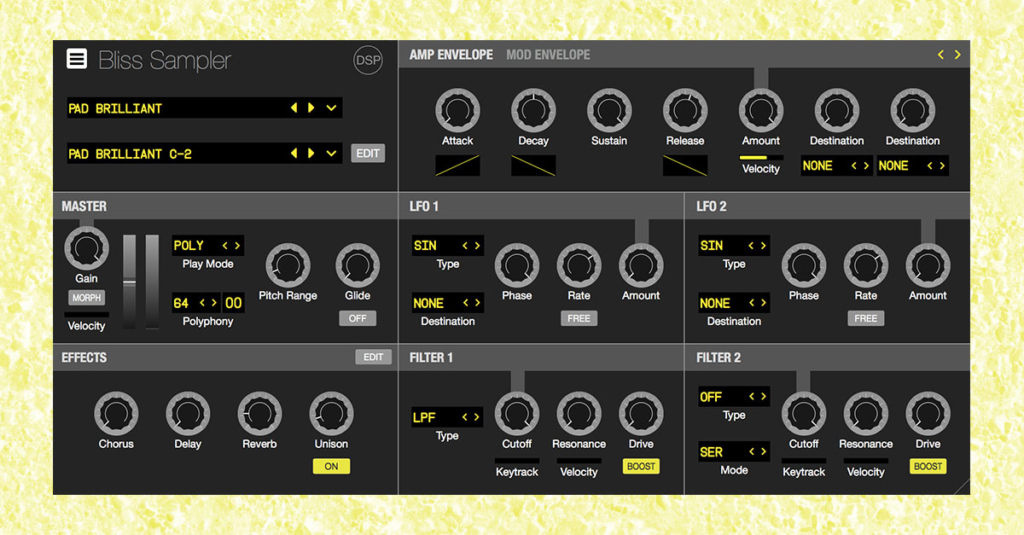
Bliss is a ‘next generation’ sampler for producers who want efficiency and new features.
One really cool feature is Bliss’ VSTi sampling: by choosing a preset, you can define the sample length, tail length, and note velocity and ranges. Bliss will create a bank of multisamples based off of your chosen settings.
On top of this unique feature, you’ll find a variety of effects, 8 customizable macros, granular modulation, and more.
Sonic Charge Cyclone
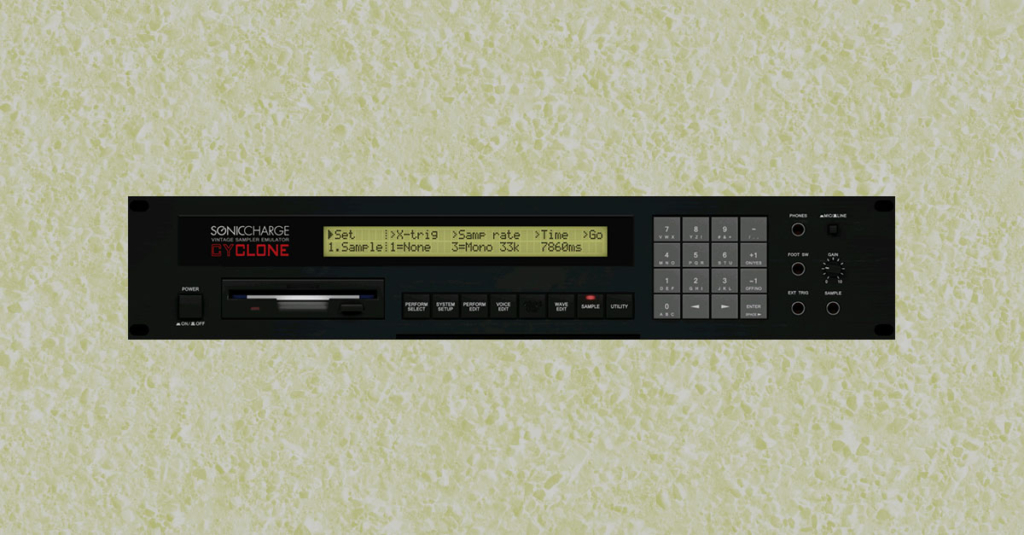
Sonic Charge Cyclone is a free VST sampler that emulates the iconic Yamaha TX16W.
You can upload your samples from your DAW and work with it’s modulation matrix, loop-finder, dual LFOs and one-per-channel ADSR envelopes to create some truly unique sounds from your sample pack.
3. Layer your samples with custom kits
Your samples don’t have to go it alone. Use them like building blocks to make something totally new.
What does a sax blast sound like layered with a bell? Or a tom layered with a tambourine tail?
Layering is the easiest and most effective way to change up the character of your samples and find the perfect sound. Sometimes samples are almost what you need but not perfect. Layering helps you get there.
Plugins like Ableton’s Impulse and NI Battery allow you to easily layer samples and quickly create melodic and percussive patterns.
A common use of custom kits is layering multiple kicks over one another to create deeper and fuller sound. Take one sample with some robust low-end, one with punch, and one with body and see how they work off one another.
No matter how you use it, layering is a great way to add some depth to your sound and turn an ‘ok’ sample into the perfect sound for your mix.
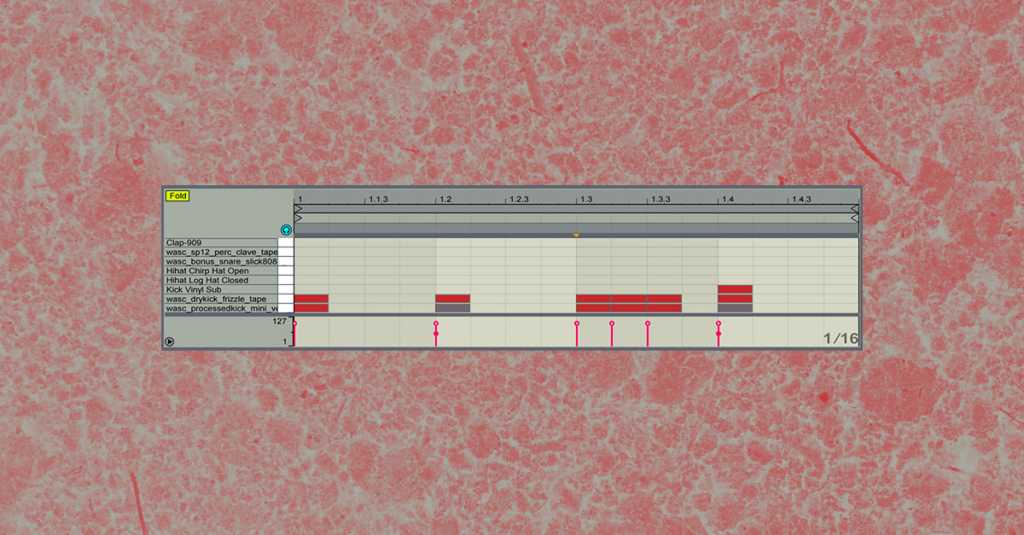
4. Chop your loops and single hits
The best sample packs all come with loops in addition to one shots and single hits.
The most common loops are usually synth and bass. They should come with a key to work with and a BPM to manipulate, making them great starting points for tracks.
But just because there’s a loop in your sample pack doesn’t mean you have to use it as is.
Using editing tools in your DAW, sampler plugins or sampling hardware, try chopping and rearranging your loops to make something new new, or take sounds from multiple loops with the same key or BPM to create your own new sequences.
Approach your loops like a starting point, not a final product. Build your own new loops and make something more unique than the same sample everyone else has.
5. Resample
Resampling is an easy way to make your samples your own.
There’s tons of ways to resample, but one of the easiest is to set the input on a new audio track to Resampling:
- Place a MIDI and Audio track side by side in your DAW
- Change the input from your audio track to ‘Resampling’
- Arm the recording on both the MIDI and Audio Track (holding command/control allows you to arm multiple tracks)
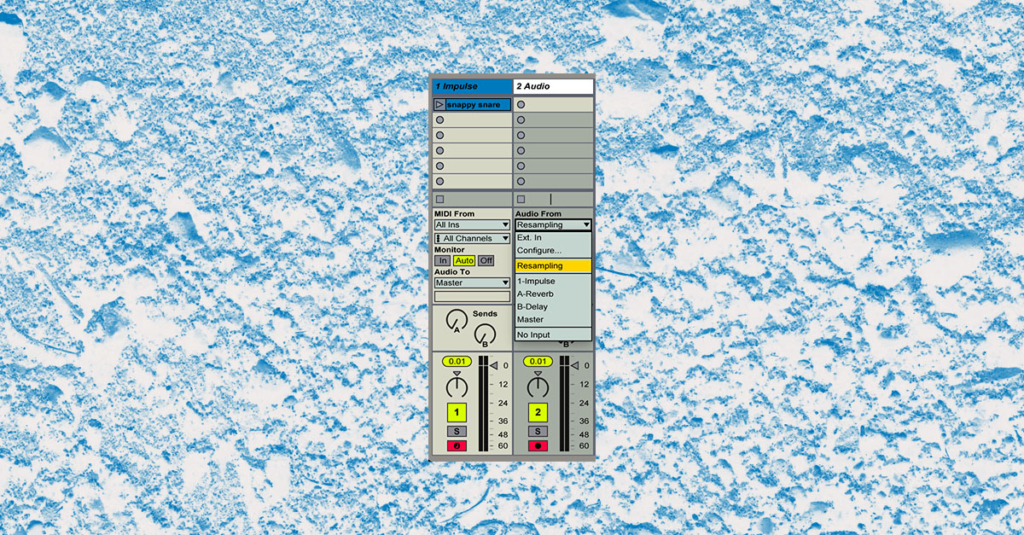
The audio from your playback, and whatever effects you choose to apply to it during resampling, will be recorded to your new audio channel. Manipulate your new audio recording however you’d like using audio effects or other editing tools.
The main advantage of using resampling over simply applying effects to MIDI is that you can control how much of the sample receives the effect, or make changes to several tracks at once without altering the original track.
For example: if you wanted to change the resonance of only the end of a sample, you could do so by resampling a loop and adjusting the resonance towards the end of the clip — any adjustments you make will be recorded onto the armed audio track.
The new recording can then be edited of run through even more effects as you see fit, all without altering your original track.
6. Filter to clean samples up or change their character
Starting your samples workflow with a simple high, low, or band-pass filter will help you clean your samples up a bit and take care of extra noise, clicks or pops.
Quick filtering can also help you fit your samples into the frequency information already present in your track.
Some creative EQing can change the entire character of a sample as well.
Taking only the higher-end information of a sample and layering it with other samples can help make your loops and shots a bit more unique and versatile. This techniques works especially well for adding texture to drums tracks.
Experiment with some simple filtering before getting too specific with your EQs. Let your filters dig out directions you maybe didn’t hear in the original sample.
If you have samples you’d like to work with but aren’t crazy about certain frequencies, add a high-pass or low-pass filter accordingly to the sample to remove any unwanted information.
For example: A sample of stringed ensemble might include information in the lower frequencies that you simply don’t need because you already have your bassline and kick arrangement sorted.
Simply filter out the low end and avoid muddying your mix.
7. Downsample
Downsampling is essentially lowering the sample rate or quality of a sound.
Normally you don’t want to do this, but it’s great if you want to create an ‘underwater’ effect that gives you more interesting results that just rolling off the high end of your samples with some EQ.
Downsampling with the free audio editor Audacity is a good place to start.
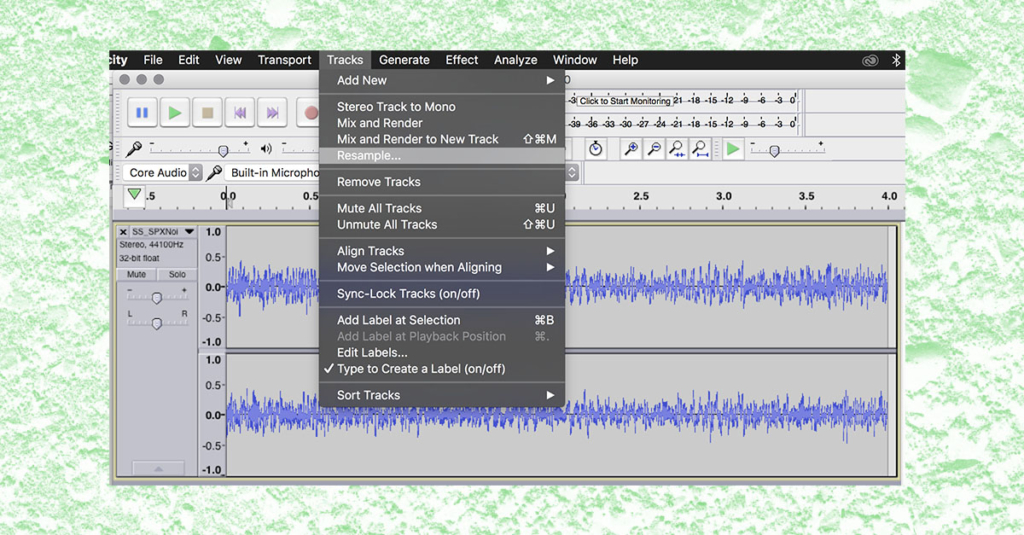
Simply import your sample into Audacity and select Resample in the Tracks menu, tweak to find your desired sample rate and downsampled sound.
Remember, when downsampling you’ll lose certain frequencies of your sample, so remember what character you’re trying to preserve while downsampling.
This process can also introduce some artifacts and ringing noise called aliasing. Aliasing can usually be tamed with a simple low-pass filter applied to your downsampled audio.
Downsampling gives you that warm ghostly effect used often by Drake and his engineer Noah ‘40’ Shebib.
8. Use ADSR Envelopes
ADSR stands for Attack, Decay, Sustain, Release.
Some built-in plugins in your DAW, VSTs, hardware synths and samplers have these controls. By manipulating them you can give a sample or sound its own unique character.
Most DAWs and sampler plugins will come with tools to apply ADSR to your samples. For example: Ableton’s simpler allows you to tweak your samples ADSR envelope quick and easy.
Drag and drop your sample into the plug-in, and adjust the controls of the ADSR envelope along the bottom to sculpt your desired sound.
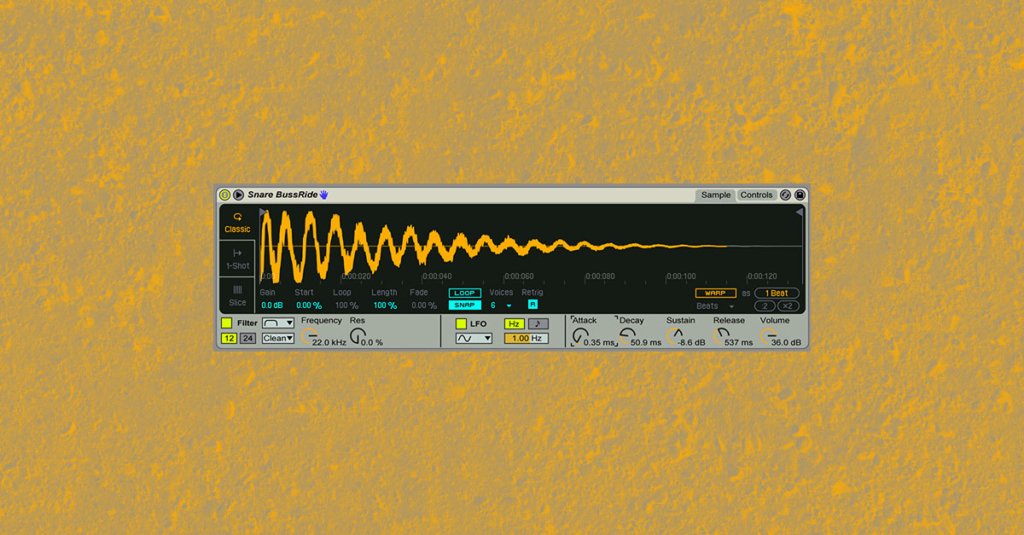
Adjusting the envelope isn’t just good for changing the character of your sound, it’s also useful as a method for cleaning up samples that might have clicks or pops at the start or decay tails that are too long.
Tweaking the envelope can help your sample fit your composition a bit better by simply adjusting a couple of parameters.
9. Convert your audio to MIDI
Wondering how to come up with parts to build around your samples? Start by transferring your sample to MIDI data using audio-to-MIDI tools.
Bouncing audio to MIDI is useful when using samples because it lets you work backwards from your samples for arrangements of other sections.
Melodyne is a great tool for bouncing audio to MIDI. Its algorithm analyzes audio and transfers the notes present into MIDI files you can easily load into MIDI tracks in your DAW.
It even allows you to select the type of audio your clip is (percussive, melodic, etc.) to get more accurate results. Pretty cool!
For example: Use Melodyne to find the notes present in a looped melody. Bounce the MIDI file to a new MIDI track and assign a nice Bass VST to the notes. Voila, now you have a bassline to work with that’s built off the notes present in your original melodic loop.
If you’re using Ableton, there’s an audio-to-MIDI feature built right in. But results between Melodyne and Ableton’s algorithm may vary. No matter what you use, your MIDI clips will need some cleanup after bouncing them from the audio of your samples.
Bouncing audio to MIDI is a quick and effective way to let your samples guide your workflow and arrangements.
10. Time stretch Creatively
Time stretching is a pretty obvious approach to working with samples. The key is finding a time stretch workflow that works for you and the right tools that allow you to get what you need from stretching your samples.
Most DAWs include their own onboard time stretch features. But plugins like HalfTime and Gross Beat take time stretching into territory with incredible creative potential.
Time stretch can instantly transforms any audio into a thick, downtempo version of itself. Or turn a slow and loping drum break into a energetic pulse.
The VSTs I mentioned above are especially great for anyone interested in producing Trap and Hip-Hop, but their features are useful no matter what genre you’re working in.
Try It Out
Remember, using samples doesn’t have to mean simply dragging & dropping recorded sounds and arranging them into a track.
Get inspired by whole world of amazing, high quality, royalty-free sounds available online and use them as starting points instead of your final sound.
Downloading a free sample pack is just the beginning of what’s possible.
Happy creating!