One of the hardest parts of composing music is writing an effective bassline – successions of notes that anchor the lower registers of your track.
There’s a million different ways to compose a bassline. This guide will focus on sequencing hardware synthesizers or VSTs within your DAW.
Most genres follow fairly straightforward 4/4 time signatures for rhythmic patterns (the beat), but with synth and basslines you have more freedom—and when you don’t have a lot of experience, that freedom is daunting.
Simple is usually best, you don’t want an overly complex bassline taking away from the rest of your track or vice versa.
So to get you in line with your best lines, here’s some helpful strategies for composing, sequencing and arranging the best basslines and building the rest of your track around it.
The Parts of a Track
Composing good melodic and rhythmic elements starts with understanding the rest of your track and how those elements will fit with everything else.
Generally, songs will contain the following sections:
- Beat: A repeated pattern of sound—this is your kick, snare, and other percussive elements like hi-hats
- Bassline: A sequence of notes with lower frequencies
- Melody: A group of notes, usually of different pitches and in the mid to upper registers, played in succession
- Chords: A group of notes—usually 3—sounded together. Chords can be played as a progression or on their own (sometimes called a stab) to add drama & impact
These 4 elements will generally make up the core of your track. Of course other elements can be added or taken away to taste. Some DAW projects have 4 tracks, others have 400. At the end of the day it’s up to you.
But no matter how many elements you have in your track, using your beat like the skeleton of your song is a great place to start for writing your other sections.
The beat holds all the other important parts of your composition together and acts as a backbone or foundation of your track.
Once you have your beat, the other parts of your track will fall into place more easily—and the easiest element to move to next is your bassline.
When you’re happy with the kick and other percussive elements, moving on to writing synth and basslines that compliment your beat is much easier because you have that skeleton to guide you.
Additional elements, such as stabs, ambient layers or chord progressions, are easier to add later on in your workflow.
Choosing Your Tools
Now that you know what the important elements are, it’s time to figure out what the actual sounds will be. When it comes to VSTs, you have a lot of choices.
Your DAW already has great options built-in, so it’s a good starting point to work with those.
But if you’re looking for some outside-the-DAW options here’s our favourite free Bass VSTs and Synth VSTs. The controls of each plugin will vary, but the general concepts for composing your basslines will stay the same.
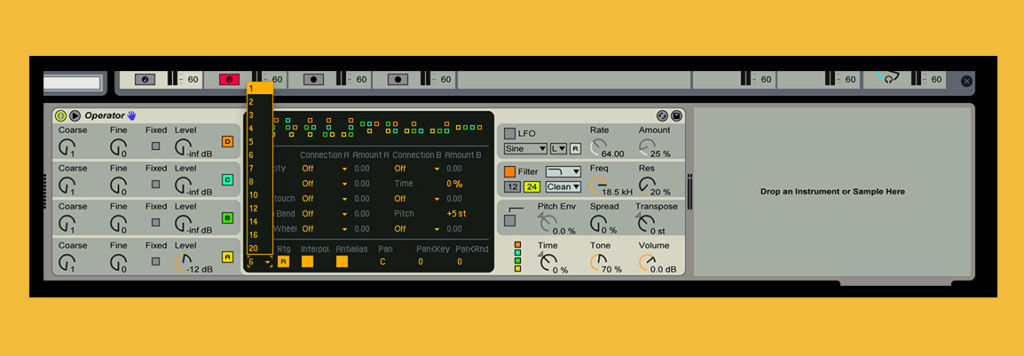
For this example, I’ll be using Ableton’s Operator. It’s a great DAW-native VST for basslines or leads depending on what you’re looking for.
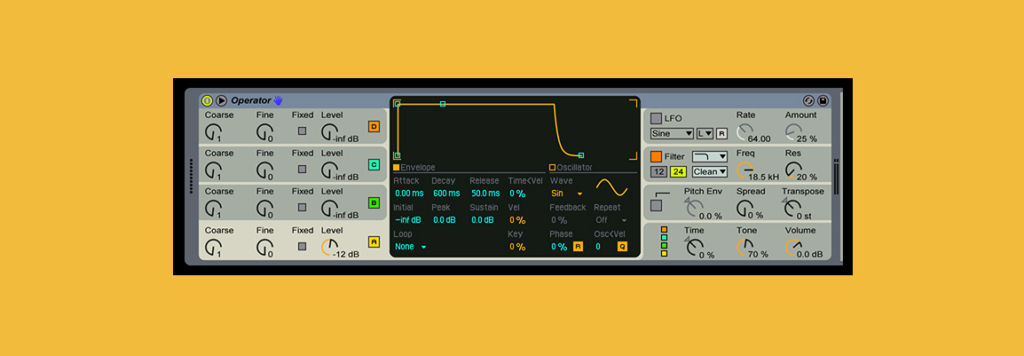
Once you have your tools, it’s time to start making some sounds and getting them in the right place…
Sound it Out
Finding a sound for your bassline that works with your beat always takes some experimentation.
You want each component of your track to stand out, while still complimenting each other. So avoid sounds that are too similar.
Similar may seem like a good thing (you want your track to be cohesive). But sounds that share too much of the same EQ information can cause parts of your track to clash.
It’s called frequency masking—a frustrating phenomenon where the audio signal from one sound affects your ability to hear another similar sound when they are played at the same time.
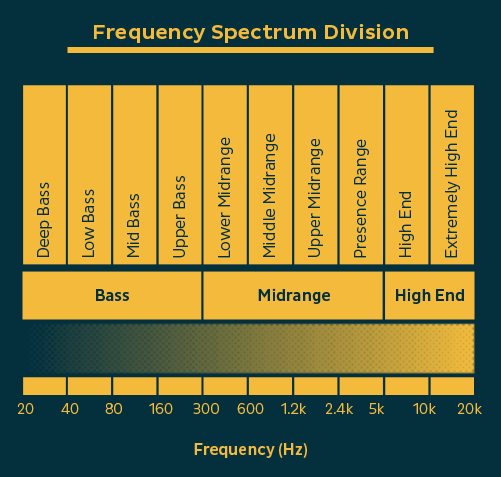
For example: if you have a 4/4 pattern kick with low, sub-based frequencies, and a bassline with similar low frequencies, the notes of your bassline that sound at the time as your kick may not be audible.
The result? A kick and bass that sounds great soloed, but flat and lifeless in the mix. The solution is choosing sounds that don’t clash by being aware of the frequency range each sound occupies.
Masking is fixable with processes like sidechain compression or EQ later on, but it can only do so much. Picking complimentary sounds that don’t clash during your recording and arranging phase will save you time and headaches when you start mixing.
Of course music and composing is subjective, so trust your creative intuition. If you think it sounds good, go with it!
Ways to Sequence
Now that you have the right sounds picked out, it’s time to get them sequenced, arranged and recorded.
Remember, the notes you choose for your bassline will determine the key of your track later. So if you have a specific chord progression, or melody in mind, make sure your bass notes are in the right key.
With that in mind, there’s a few different ways to write and sequence your basslines in your DAW.
Using Draw Mode:
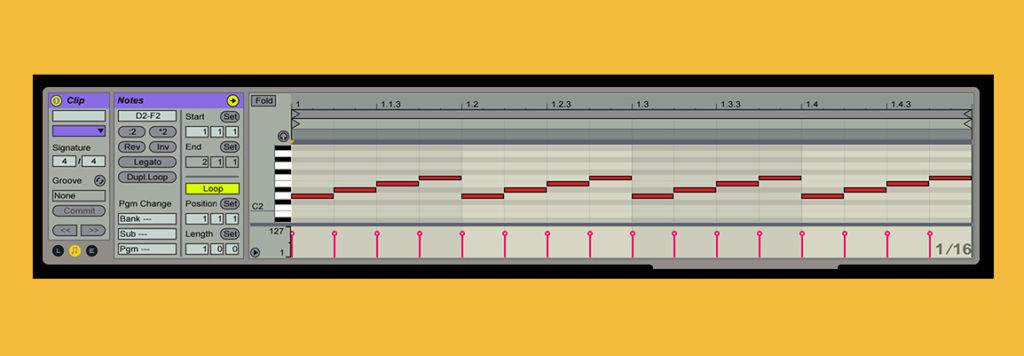
Draw mode allows you to simply draw your sequence into the MIDI note editor. Working this way gives you a lot of control over note placement and the ability to pull off basslines that you wouldn’t be able to physically play.
The visual aspect of Draw Mode is also helpful. It lets you see how your bassline unfolds as well as hearing it. Finding the perfect spot for that extra note is a lot easier when working this way.
Hot Tip: Once you’ve chosen an octave you’d like to work in, sequence your pattern with the MIDI Editor Preview (sound) off. Focus on creating a visual pattern and then listen back after. You’ll be surprised at how well something that looks visually appealing can sound appealing as well. And remember, simple is often best.
If it sounds a little flat, going back in and adding a few notes of a higher octave (but within the same key) can add groove to your sequence.
Adjusting the velocity of of each note can also add some nice groove to your track as well and makes your performance a little more exciting. Simply adjust the red velocity markers at the bottom of your piano roll (see above).
Using a MIDI Controller:
Working with a MIDI controller is helpful as it allows you to work with your hands and can give you some less ‘rigid’ sequences.
The best part about working with keys is the jam aspect. Recording a full performance with multiple ‘riffs’ is helpful for discovering basslines on the fly. Listen back to sections of your jam for sections you like and get rid of the parts that weren’t working.
If you recorded a sequence with your MIDI controller but the timing of the notes is a bit off, use quantization to tighten everything up.
Un-quantized:
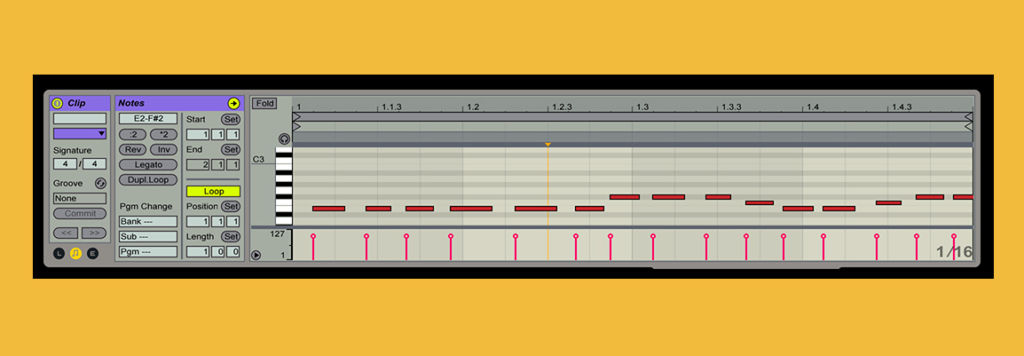
Quantized:
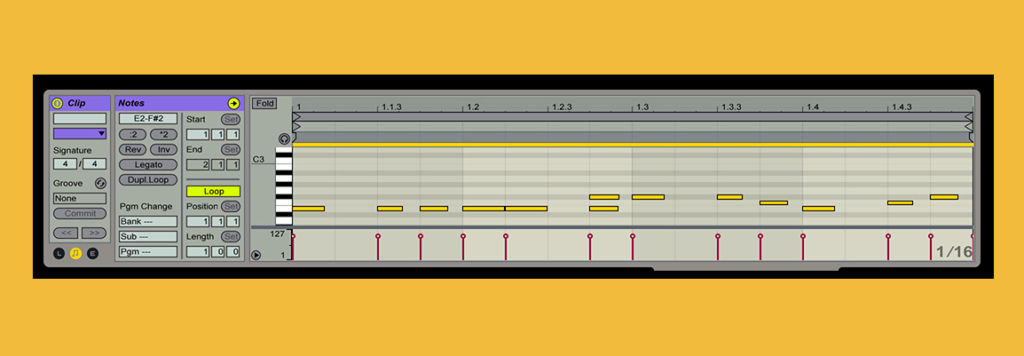
The quantization menu will differ depending on your DAW. Here’s how to quantize your MIDI notes in Ableton:
- Click inside the MIDI Note Editor to select it
- Edit > Select All
- Edit > Quantize Settings
- Quantize to 1/16 (if you’re working with quarter notes), select ‘start’ under Adjust Note, and change amount to 100%

Quantization will snap your notes to the grid, which is great for cleaning up rough sketches of your bassline ideas.
The downside to using quantization is that the notes may snap to the grid in a way you didn’t intend and change the sound of your sequence or take that human element out of your performance.
Remember, you can always go back and move your notes around after to find that perfect touch or add some DAW swing for some extra groove.
Using your MIDI keyboard and draw mode as a combo:
Record a sequence using the MIDI Keyboard. When you’re done, go back to your MIDI editor, adjust notes and snap them to the grid right where you want them. You’ll have more control over your sound and MIDI performance.
Listening back to your bassline and adding to, or slightly tweaking your arrangement is the most effective way to write as it gives you the best of both workflows.
But be careful what you add after your initial performance. Drawing in too many notes can turn a simple and effective arrangement into a complex mess pretty quick. So draw sparingly if you can.
Mono On
Your basslines should stand out. Writing your sequences on a polyphonic synth (a synth that has multiple voices) can make the notes blend into one another and sound muddy.
A mono, or single-voiced synth, plays one note at a time—the previous note cutting off as the next starts. This creates articulate, focused sequences that are especially good for basslines.
Here’s how to switch to one voice on Ableton’s Operator, simply click the voices tab and select 1:
Finishing It Off: Shaping Your Sound & Adding Effects
Compression & EQ
Once you’re happy with your sequence, use compression and EQ to further shape your sound and add that finishing touch.
Compression, put simply, will lessen the dynamic range between the loudest and quietest parts of your audio. Using compression properly will add punch and presence to your basslines.
EQ is also effective when building out your beat and bass. A simple EQ Three rack in your DAW allows you to adjust your sound and fix some of those masking issues I discussed earlier.
Use your EQ to carve out your bassline frequencies that may clash with other parts of your track.
Audio Effects:
Adding audio effects to a synth or bassline should always be a finishing touch. Effects can only do so much, so it’s really important to have a solid sound you’re happy with before adding effects. Only use effects to enhance your sound, not change it entirely.
When it comes to basslines, certain effects are better than others. For example: Chorus is a great way to fatten and thicken your basslines in the mix. Learn more about how to use effects throughout your mix in our audio effects guide.
Practice Makes Perfect
Remember that basslines take time. Synth and basslines are tricky and even experienced producers can struggle with composing them.
When you’re just starting out, these tips and tricks for making composing lines will help get you started and build confidence as a producer.
So the next time you need a quick line, you’ll have the right tools—and the rest of your track will fall in to place around it.

