Sometimes silence is golden.I used to get really annoyed when my masters would come back and a little mistake I had made was now loud and clear.
Before you send your mix out for audio mastering, there are 5 steps you have to take to get the best results.
At first I blamed everyone else. But I slowly realized that it was all MY fault. I was making mixing mistakes that needed fixing.
Don’t make the same mistakes I did. Follow these 5 steps and finish your tracks the right way.
1. Housecleaning
When you create a track you’re also creating the room that it’s in. Don’t be lazy and not clean it up before you have company over. Clean up your mix:
- Check your edit points – Go back into the mix to all the places where you made edits in the mixing phase. Listen close to the edit points. Make sure your fades are seamless and there’s no abrupt cut off or drop out. Just like a haircut, the smooth fade is the better fade.
- Solo your tracks – Listen to each track on it’s own. Make sure they’re faded in and out properly. These are the little things that you can’t fix after you export. So be safe and check before it’s too late.
- Take out the garbage – Take out the pops, the clicks, the blips, and the swishes that may have snuck into your mix. This is your last chance to remove all the little sound artifacts. Check each track in solo mode. Be thorough. Mastering can amplify and magnify these unwanted noises. So it’s better to be safe than sorry.
2. Leave headroom
Headroom is something you should be considering throughout the mixing phase. But It’s a good idea to check it again while you’re finalizing a project.
This is the most important key to getting the most out of your mastering tool.
You need to leave a certain amount of space—typically about 6dBFs between ‘0’ and the loudest part of your track.
Hot Tip: don’t use any processing on your master bus that increases the level of your bounced files. Mastering will take care of that. And make sure you know when to apply dithering.
3. The top…
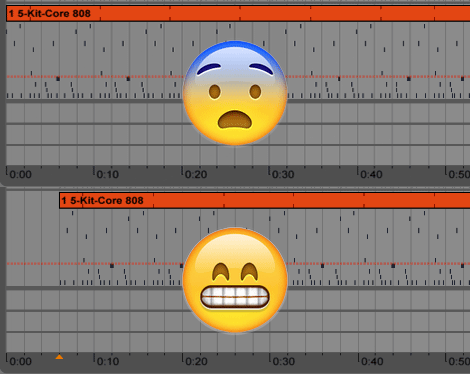
The first thing you should hear at the start of your track is silence. Confused? Let me explain.
Mastering needs room to work. So leave one bar of courtesy space at the start of your track.
This will also give you the option to alter your intro or fade-in down the road if you decide that your original wasn’t working.
4. And The Tail
The last thing you should hear at the end of your track is also silence. So leave a bar of silence at the end of your track as well.
Even after the fade out you should be leaving a space of silence. This will ensure that all your reverbs and delays have room to fade out completely.
Delays and reverbs will continue long after the sound that they’re applied to. So be aware of how they tail off. Nothing is worse than having a delay cut off at the very end of your track.
Learn more about how to use reverb and delay in our how to mix music guide.
A little bit of silence is also great for giving the listener a moment to reflect on how much they enjoyed listening to your track. :)
5. Just Listen
Put on headphones and listen to your ENTIRE song all the way through. Better yet, do it twice. This is your final chance to be absolutely sure everything is in order.
The first time around listen for all the technicalities I mentioned above—artifacts, fades, edit points, reverb and delay tails.
This ensures that all your housecleaning is done.
Then listen again. But listen objectively. Stop being a mixer and just be a music enjoyer. Does your track do everything you want it to? Is it sounding perfect in all the right places?
It is? Perfect. Now you can finally be done the right way.
Ready to master
Your track is now perfectly polished and primed for mastering. Without all the mistakes I used to make.
Feel free to go ahead and master away.
Because friends don’t let friends release un-mastered music.


